Apache Maven is a software project management and comprehension tool. Based on the concept of a project object model (POM), Maven can manage a project’s build, reporting and documentation from a central piece of information.
If you think that Maven could help your project, you can find out more information in the “About Maven” section of the navigation: this includes an in-depth description of what Maven is and a list of some of its main features.
This site is separated into the following sections, depending on how you’d like to use Maven:
首先去Apache官网下载Maven:http://maven.apache.org
将对应的压缩包解压出来这里我使用的是Windows系统解压到在C:\\maven下面然后根据压缩包中的README.txt提示进行安装
                          Apache Maven

  What is it?
  -----------

  Maven is a software project management and comprehension tool. Based on
  the concept of a Project Object Model (POM), Maven can manage a project's
  build, reporting and documentation from a central piece of information.

  Documentation
  -------------

  The most up-to-date documentation can be found at https://maven.apache.org/.

  Release Notes
  -------------

  The full list of changes can be found at https://maven.apache.org/docs/history.html.

  System Requirements
  -------------------

  JDK:
    1.7 or above (this is to execute Maven - it still allows you to build against 1.3
    and prior JDK's).
  Memory:
    No minimum requirement.
  Disk:
    Approximately 10MB is required for the Maven installation itself. In addition to
    that, additional disk space will be used for your local Maven repository. The size
    of your local repository will vary depending on usage but expect at least 500MB.
  Operating System:
    Windows:
      Windows 2000 or above.
    Unix based systems (Linux, Solaris and Mac OS X) and others:
      No minimum requirement.

  Installing Maven
  ----------------

  1) Unpack the archive where you would like to store the binaries, e.g.:

    Unix-based operating systems (Linux, Solaris and Mac OS X)
      tar zxvf apache-maven-3.x.y.tar.gz
    Windows
      unzip apache-maven-3.x.y.zip

  2) A directory called "apache-maven-3.x.y" will be created.

  3) Add the bin directory to your PATH, e.g.:

    Unix-based operating systems (Linux, Solaris and Mac OS X)
      export PATH=/usr/local/apache-maven-3.x.y/bin:$PATH
    Windows
      set PATH="c:\program files\apache-maven-3.x.y\bin";%PATH%

  4) Make sure JAVA_HOME is set to the location of your JDK

  5) Run "mvn --version" to verify that it is correctly installed.

  For complete documentation, see https://maven.apache.org/download.html#Installation

  Licensing
  ---------

  Please see the file called LICENSE.

  Maven URLS
  ----------

  Home Page:          https://maven.apache.org/
  Downloads:          https://maven.apache.org/download.html
  Release Notes:      https://maven.apache.org/docs/history.html
  Mailing Lists:      https://maven.apache.org/mailing-lists.html
  Source Code:        https://gitbox.apache.org/repos/asf/maven.git
  Issue Tracking:     https://issues.apache.org/jira/browse/MNG
  Wiki:               https://cwiki.apache.org/confluence/display/MAVEN/
  Available Plugins:  https://maven.apache.org/plugins/
根据上面的方法设置完成后进入cmd输入mvn -version得到如下类似结果就说明你的Maven安装完成了!
C:\Users\Michael Jiang>mvn -version
Apache Maven 3.6.1 (d66c9c0b3152b2e69ee9bac180bb8fcc8e6af555; 2019-04-05T03:00:29+08:00)
Maven home: C:\maven\bin\..
Java version: 1.8.0_181, vendor: Oracle Corporation, runtime: C:\Program Files\Java\jdk1.8.0_181\jre
Default locale: zh_CN, platform encoding: GBK
OS name: "windows 10", version: "10.0", arch: "amd64", family: "windows"
然后就是打开conf/setting.xml文件配置一个国内镜像(这里就用阿里云吧)
<mirror>
	 <id>alimaven</id>
	 <name>aliyun maven</name>
	 <url>http://maven.aliyun.com/nexus/content/groups/public/</url>
	 <mirrorOf>central</mirrorOf>
</mirror>
设置好了,就建一个Maven工程来测试一下Java连接Redis吧?
1.打开Eclipse新建一个Maven工程
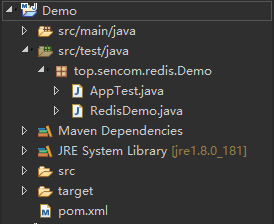
在测试下面建一个RedisDemo.java文件
2.打开工程pom文件添加jar包
<!-- https://mvnrepository.com/artifact/redis.clients/jedis -->
	<dependency>
	    <groupId>redis.clients</groupId>
	    <artifactId>jedis</artifactId>
	    <version>3.1.0</version>
	</dependency>
需要jar包可以到https://mvnrepository.com/上寻找,非常方便!
添加好后Eclipse就会自动帮我们下载依赖
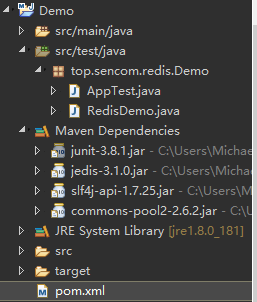
可以看到关于redis的依赖已经下载完成!
3.编写测试代码
package top.sencom.redis.Demo;

import redis.clients.jedis.Jedis;

public class RedisDemo {

	public static void main(String[] args) {
		// TODO Auto-generated method stub
		String host = "sencom.top";
		int port = 6379;
		@SuppressWarnings("resource")
		Jedis jedis = new Jedis(host,port);
		jedis.auth("123456");
		System.out.println(jedis.ping());
	}

}
如果连接成功应该可以看到这样的输出:
PONG
/**
	 * Redis 字符串类型存取
	 */
	@Test
	public void t1() {
		// 获取redis 连接
		String host = "sencom.top";
		int port = 6379;
		@SuppressWarnings("resource")
		Jedis jedis = new Jedis(host,port);
		jedis.auth("123456");

		jedis.set("mysql", "没压岁钱了");
		jedis.set("china", "中国");

		System.out.println(jedis.get("mysql"));
		System.out.println(jedis.get("china"));

		//关闭连接
		jedis.close();
	}
执行结果
没压岁钱了
中国
连接池配置
RedisPoolUtil.java
package top.sencom.redis.Demo;

import redis.clients.jedis.Jedis;
import redis.clients.jedis.JedisPool;
import redis.clients.jedis.JedisPoolConfig;

public class RedisPoolUtil {

	private static JedisPool pool;
	static {
		String host = "sencom.top";
		int port = 6379;

		JedisPoolConfig poolConfig = new JedisPoolConfig();
		poolConfig.setMaxTotal(10);	//最大连接数
		poolConfig.setMaxIdle(1);	//最大空闲数

		pool = new JedisPool(poolConfig,host,port);
	}

	public static Jedis getJedis() {
		Jedis jedis = pool.getResource();
		jedis.auth("123456");
		return jedis;
	}

	public static void close(Jedis jedis) {
		jedis.close();
	}
}
RedisDemo.java
package top.sencom.redis.Demo;

import org.junit.Test;

import redis.clients.jedis.Jedis;

public class RedisDemo {

	public static void main(String[] args) {
		// TODO Auto-generated method stub


	}

	/**
	 * Redis 字符串类型存取
	 */
	@Test
	public void t1() {
		// 获取redis 连接
		Jedis jedis = RedisPoolUtil.getJedis();

		jedis.set("asus", "华硕");
		jedis.set("msi", "微星");

		System.out.println(jedis.get("asus"));
		System.out.println(jedis.get("msi"));

		//关闭连接
		RedisPoolUtil.close(jedis);
	}

}
此时再执行t1的单元测试结果如下:
华硕
微星