


使用OpenCV对图像进行掩膜操作可以将图像锐化看起来更清晰。
首先手动实现
//OpenCV图像锐化实现
//Michael Jiang<sencom1997@outlook.com>
//2019年7月23日12:17:20

#include<opencv2/opencv.hpp>
#include<iostream>

using namespace cv;
int main()
{
	//打开源图像
	Mat src_img = imread("D:/go.png", IMREAD_COLOR);

	//判断是否打开成功
	if (!src_img.data)
	{
		printf("can not open the img!\n");
		return -1;
	}

	//初始化目标图像,并填充0(黑色)
	Mat dst_img = Mat::zeros(src_img.size(), src_img.type());

	//初始化显示src图片的窗口
	namedWindow("src win", WINDOW_AUTOSIZE);

	//初始化显示dst图片的窗口
	namedWindow("dst win", WINDOW_AUTOSIZE);

	//锐化算法实现(矩阵的掩膜操作)
	//红色是中心元素I(i,j)。掩膜操作公式
	//I(i,j)=5∗I(i,j)−[I(i−1,j)+I(i+1,j)+I(i,j−1)+I(i,j+1)]
	//用此掩膜从上至下,从左至右对图像进行操作,得到的图像就是增强对比度的图像。
	int cols = (src_img.cols - 1) * src_img.channels();
	int offsetx = src_img.channels();
	int rows = src_img.rows;

	for (int row = 1; row < rows - 1; row++)
	{
		const uchar* previous = src_img.ptr<uchar>(row - 1);
		const uchar* current = src_img.ptr<uchar>(row);
		const uchar* next = src_img.ptr<uchar>(row + 1);
		uchar* output = dst_img.ptr<uchar>(row);
		for (int col = offsetx; col < cols; col++) {
			output[col] = saturate_cast<uchar>(5 * current[col] - (current[col - offsetx] + current[col + offsetx] + previous[col] + next[col]));
		}
	}

	//在窗口上显示图像
	imshow("src win", src_img);
	imshow("dst win", dst_img);

	waitKey(0);
	return 0;
}saturate_cast将计算超出[0,255]范围的值调节到正确的范围内。
理解通过指针对图像位操作。
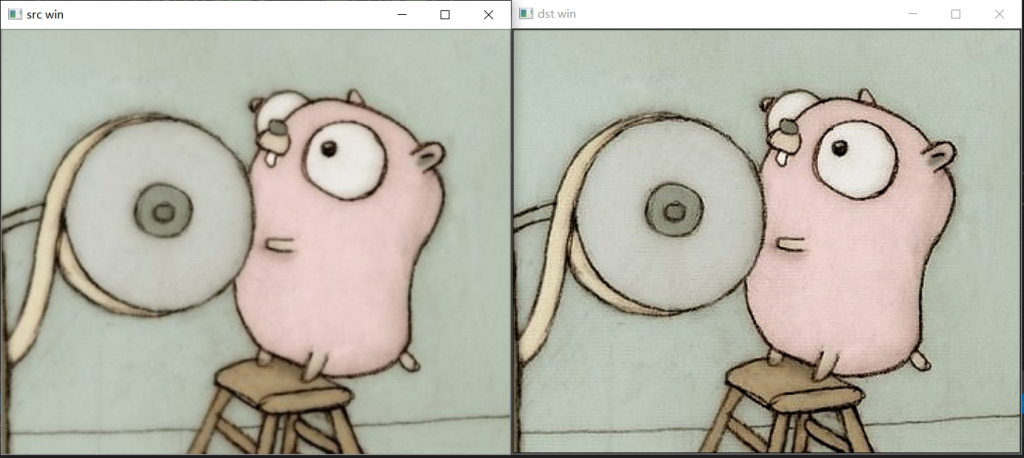
可以看出图片明显清晰了许多。
那么这么好用的功能OpenCV肯定给我们写好了方法吧?
OpenCV YES!
//OpenCV图像锐化实现
//Michael Jiang<sencom1997@outlook.com>
//2019年7月23日12:17:20

#include<opencv2/opencv.hpp>
#include<iostream>

using namespace cv;
int main()
{
	//打开源图像
	Mat src_img = imread("D:/go.png", IMREAD_COLOR);

	//判断是否打开成功
	if (!src_img.data)
	{
		printf("can not open the img!\n");
		return -1;
	}

	//定义目标图像
	Mat dst_img;
	//初始化显示src图片的窗口
	namedWindow("src win", WINDOW_AUTOSIZE);

	//初始化显示dst图片的窗口
	namedWindow("dst win", WINDOW_AUTOSIZE);

        //锐化
	Mat kernel = (Mat_<char>(3, 3) << 0, -1, 0, -1, 5, -1, 0, -1, 0);
	filter2D(src_img, dst_img, src_img.depth(), kernel);

	//在窗口上显示图像
	imshow("src win", src_img);
	imshow("dst win", dst_img);

	waitKey(0);
	return 0;
}