0、写在前面
该项目灵感来自我自己的早期作品:ESP8266+LCD1602新玩法 。LCD1602存在着诸多不足,例如不能够显示中文字符,屏幕只能显示 16*2 个字符且功耗高(相对于墨水屏来说),但它在价格上要比墨水屏便宜的多。本次思路大致就是:墨水屏通过ISP协议与ESP8266通讯,ESP8266 通过WIFI连接我的无线AP,然后跑一个WebServer,通过HTTP协议与外界沟通。预计应用:显示天气,热点新闻,对于没有监视器的SBC如RaspberryPI,当我们在上面跑一些诸如爬虫的项目时可以用作项目进度或是错误提示。
1、项目准备
- ESP8266 * 1
- 面包板 * 1
- 杜邦线 * 若干
- 墨水屏2.9寸 * 1
2、测试屏幕
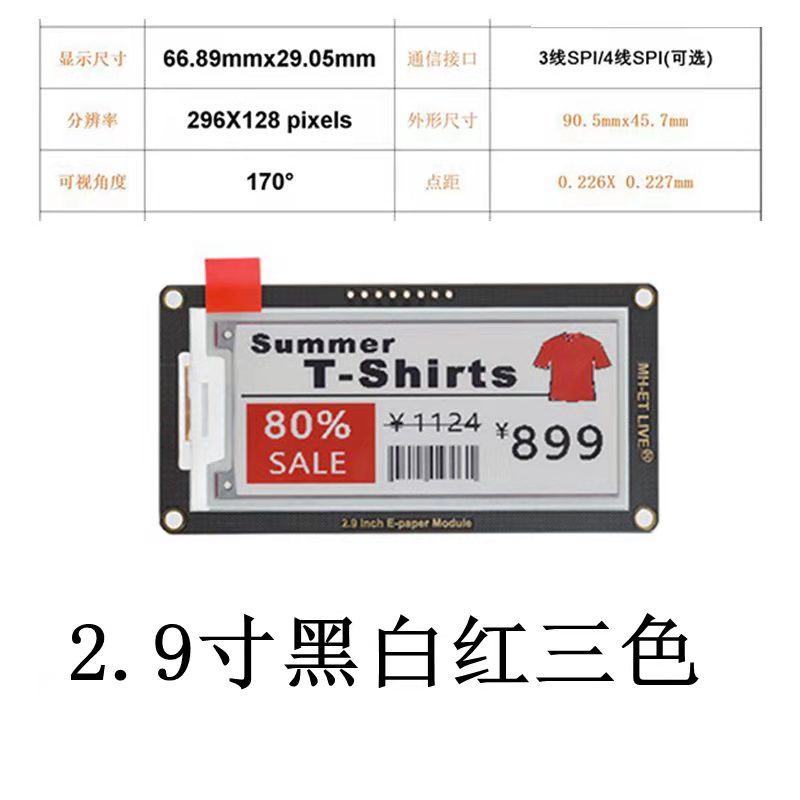
淘宝买的屏幕,但是卖家没有ESP8266的例子,我只能拿arduino的代码进行修改。但是改来改去都不行,实在是不靠谱!放置了几天转而去Github上寻找,于是找到了这个:https://github.com/ZinggJM/GxEPD2 (其实是先找的GxEDP,试了一下也不行,然后才发现的GxEDP2)。这里对照我买的EPD,我选择了GDEW029Z13 2.9″ b/w/r。
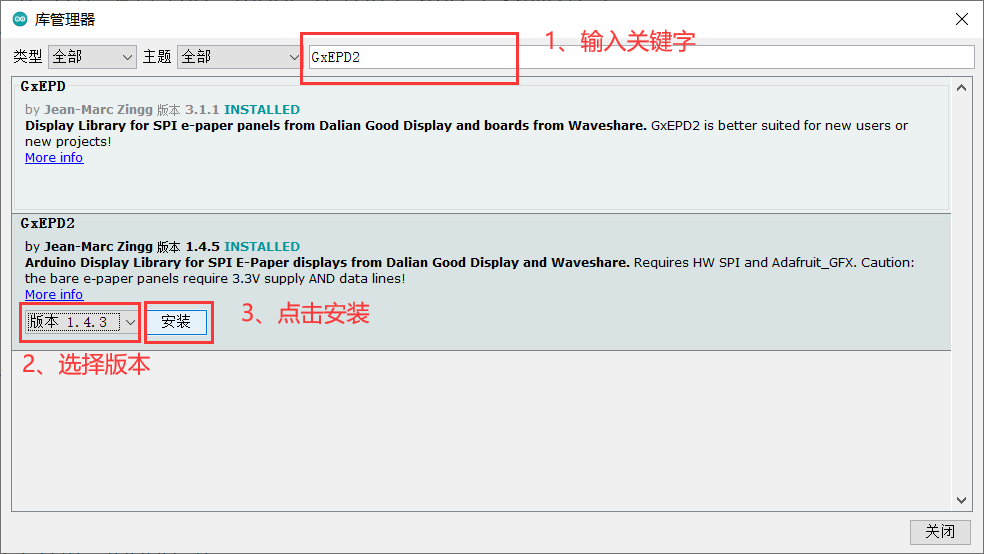
可以选择下载release然后将压缩包导入arduino IDE中,或是直接去arduino IDE中的:工具 -> 库管理器
这里简单选择一个例子:
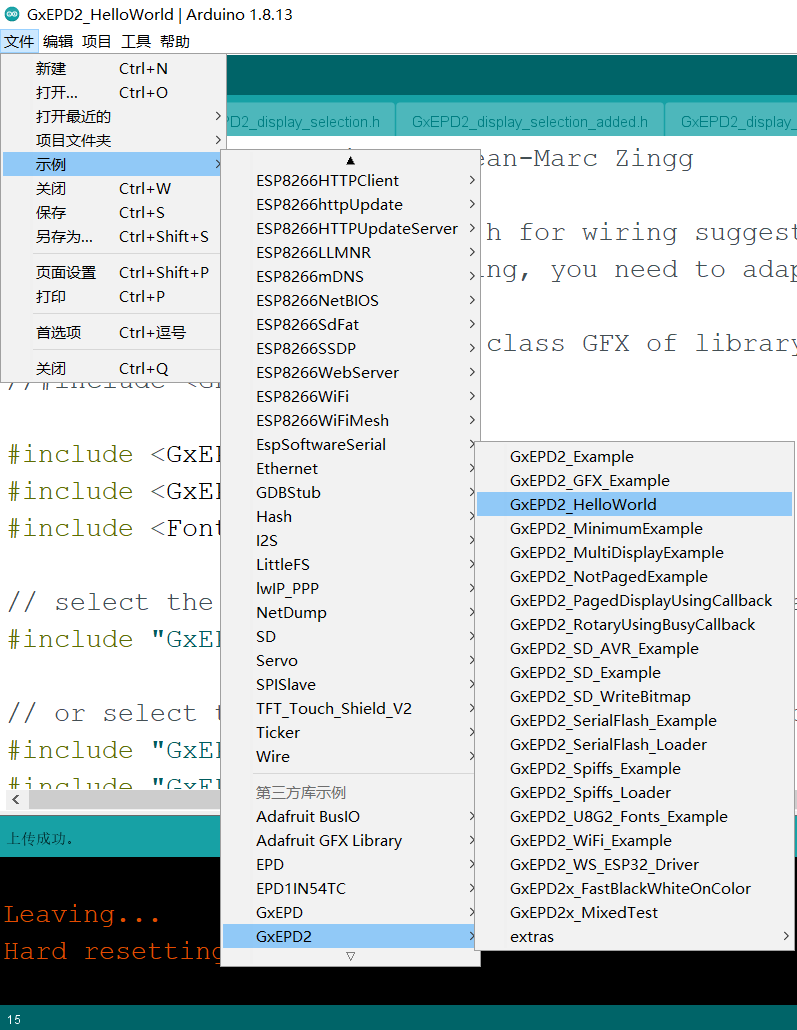
然后简单修改一下代码:
// GxEPD2_HelloWorld.ino by Jean-Marc Zingg
// see GxEPD2_wiring_examples.h for wiring suggestions and examples
// if you use a different wiring, you need to adapt the constructor parameters!
// uncomment next line to use class GFX of library GFX_Root instead of Adafruit_GFX
//#include <GFX.h>
#include <GxEPD2_BW.h>
#include <GxEPD2_3C.h>
#include <Fonts/FreeMonoBold9pt7b.h>
// select the display class and display driver class in the following file (new style):
#include "GxEPD2_display_selection_new_style.h"
// or select the display constructor line in one of the following files (old style):
#include "GxEPD2_display_selection.h"
#include "GxEPD2_display_selection_added.h"
// alternately you can copy the constructor from GxEPD2_display_selection.h or GxEPD2_display_selection_added.h to here
GxEPD2_3C<GxEPD2_290_Z13c, GxEPD2_290_Z13c::HEIGHT> display(GxEPD2_290_Z13c(/*CS=15*/ 0, /*DC=4*/ 4, /*RST=2*/ 2, /*BUSY=5*/ 5)); // GDEH029Z13
void setup()
{
display.init();
helloWorld();
display.hibernate();
}
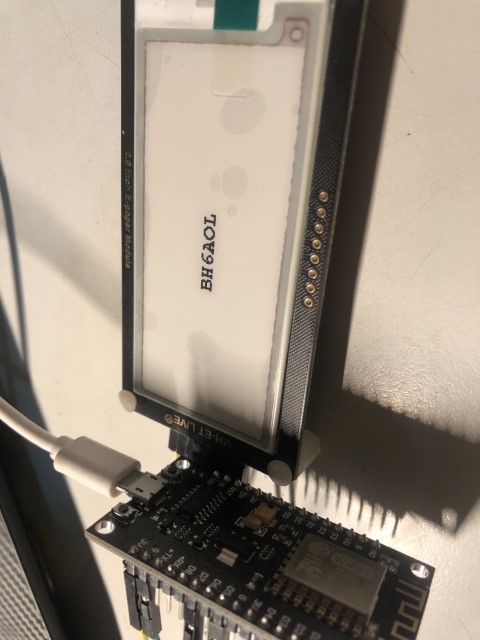
const char HelloWorld[] = "BH6AOL";
void helloWorld()
{
display.setRotation(1);
display.setFont(&FreeMonoBold9pt7b);
display.setTextColor(GxEPD_BLACK);
int16_t tbx, tby; uint16_t tbw, tbh;
display.getTextBounds(HelloWorld, 0, 0, &tbx, &tby, &tbw, &tbh);
// center the bounding box by transposition of the origin:
uint16_t x = ((display.width() - tbw) / 2) - tbx;
uint16_t y = ((display.height() - tbh) / 2) - tby;
display.setFullWindow();
display.firstPage();
do
{
display.fillScreen(GxEPD_WHITE);
display.setCursor(x, y);
display.print(HelloWorld);
}
while (display.nextPage());
}
void loop() {};
接线方式如下:
ESP8266     EPD
GPIO5   ->  BUSY
GPIO2   ->  RESET
GPIO4   ->  DC
GPIO0   ->  CS        # 因为ESP8266的CS默认为D8 会干扰USB烧录程序,所以更改
GPIO14  ->  SCLK
GPIO13  ->  SDI
3.3V    ->  VCC
GND     ->  GND
测试运行结果如下: